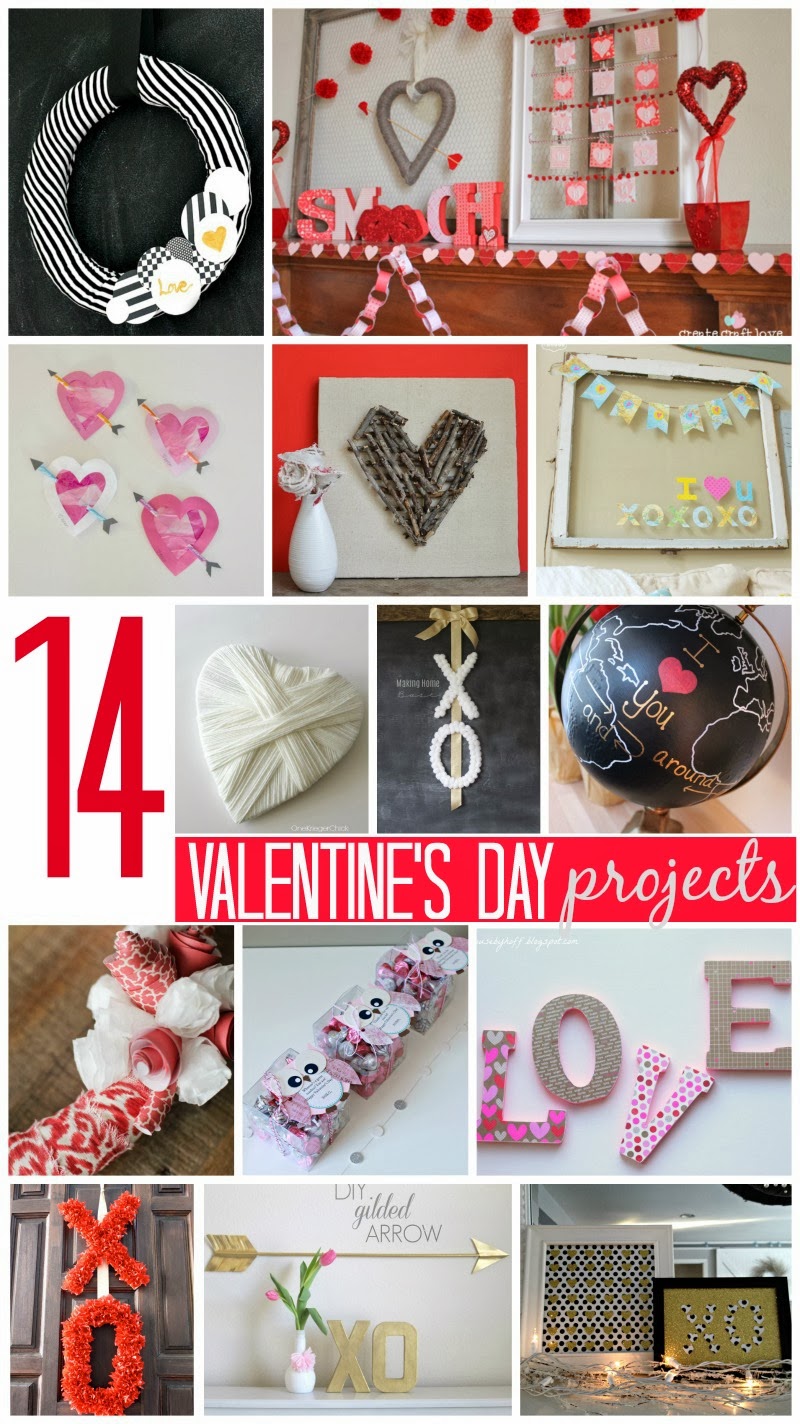
It’s February, which means the blogosphere is full of fun and inspiring Valentine projects!
Today I’m taking part in Valentine Blog Hop with 13 amazing bloggers!
If you’re “hopping” over from another blog, welcome!
Hope to see you around here often!
Let’s get to my Valentine project, shall we?
I was shopping at an amaaaaazing scrapbook paper store the other week…
{Well actually I was running around the store drooling over cute Valentine scrapbook paper, pulling it off the shelf as quickly as I could, while Miss L. was about to lose her mind about wanting to ride a carousel that was right outside of the store.}
I know.
Who puts a carousel right outside an amazing scrapbook store?!?
Can you imagine how many crafty moms have nearly lost their marbles in that store?
Anyways, that has nothing to do with anything.
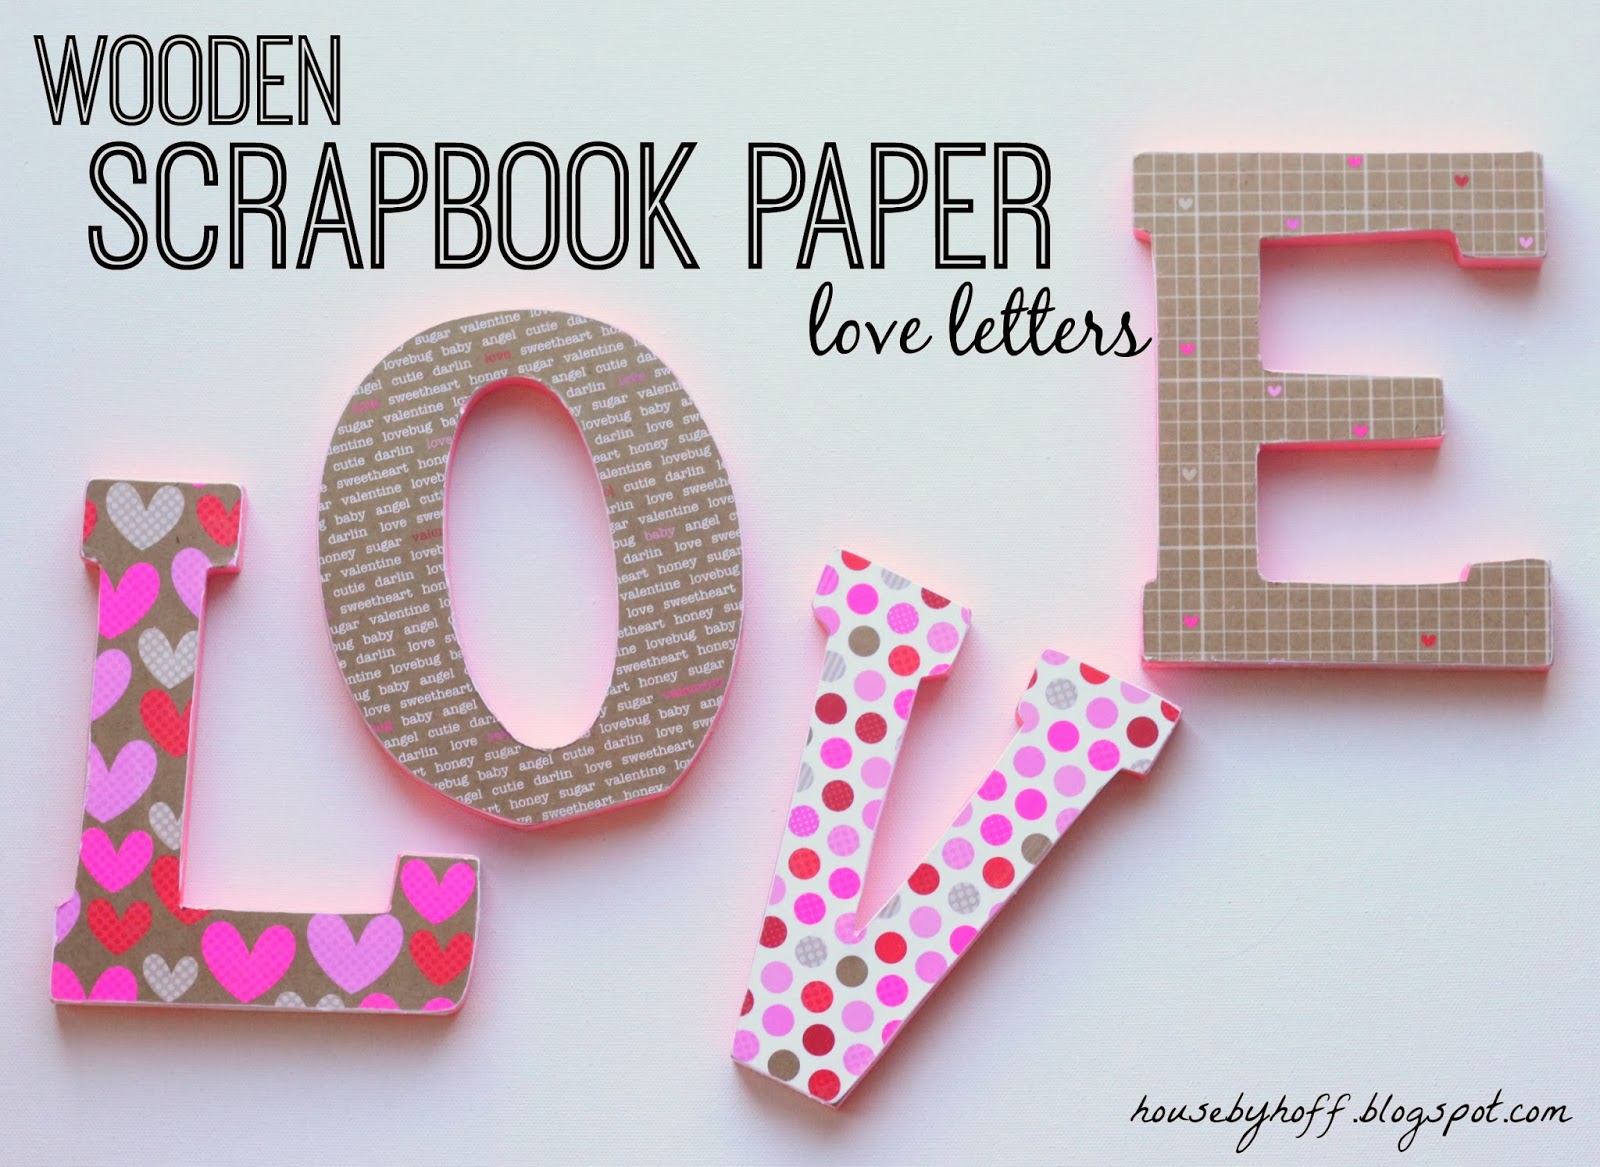
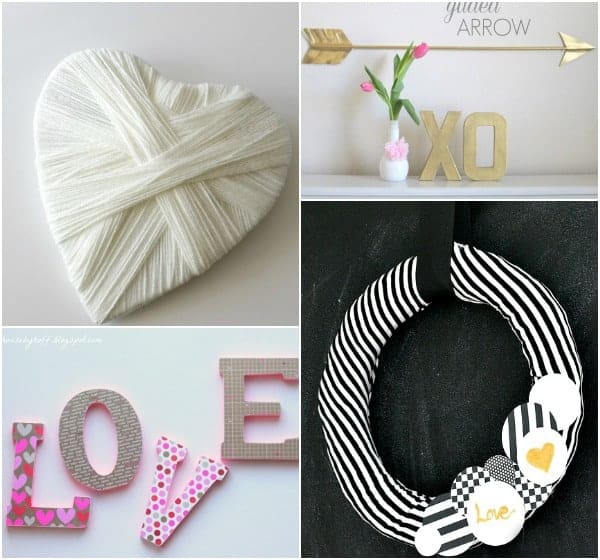
The super-nice girl who was ringing me up was making these adorable wooden scrapbook paper letters. I interrogated asked her about how she was making them, and she gave me some great tips!
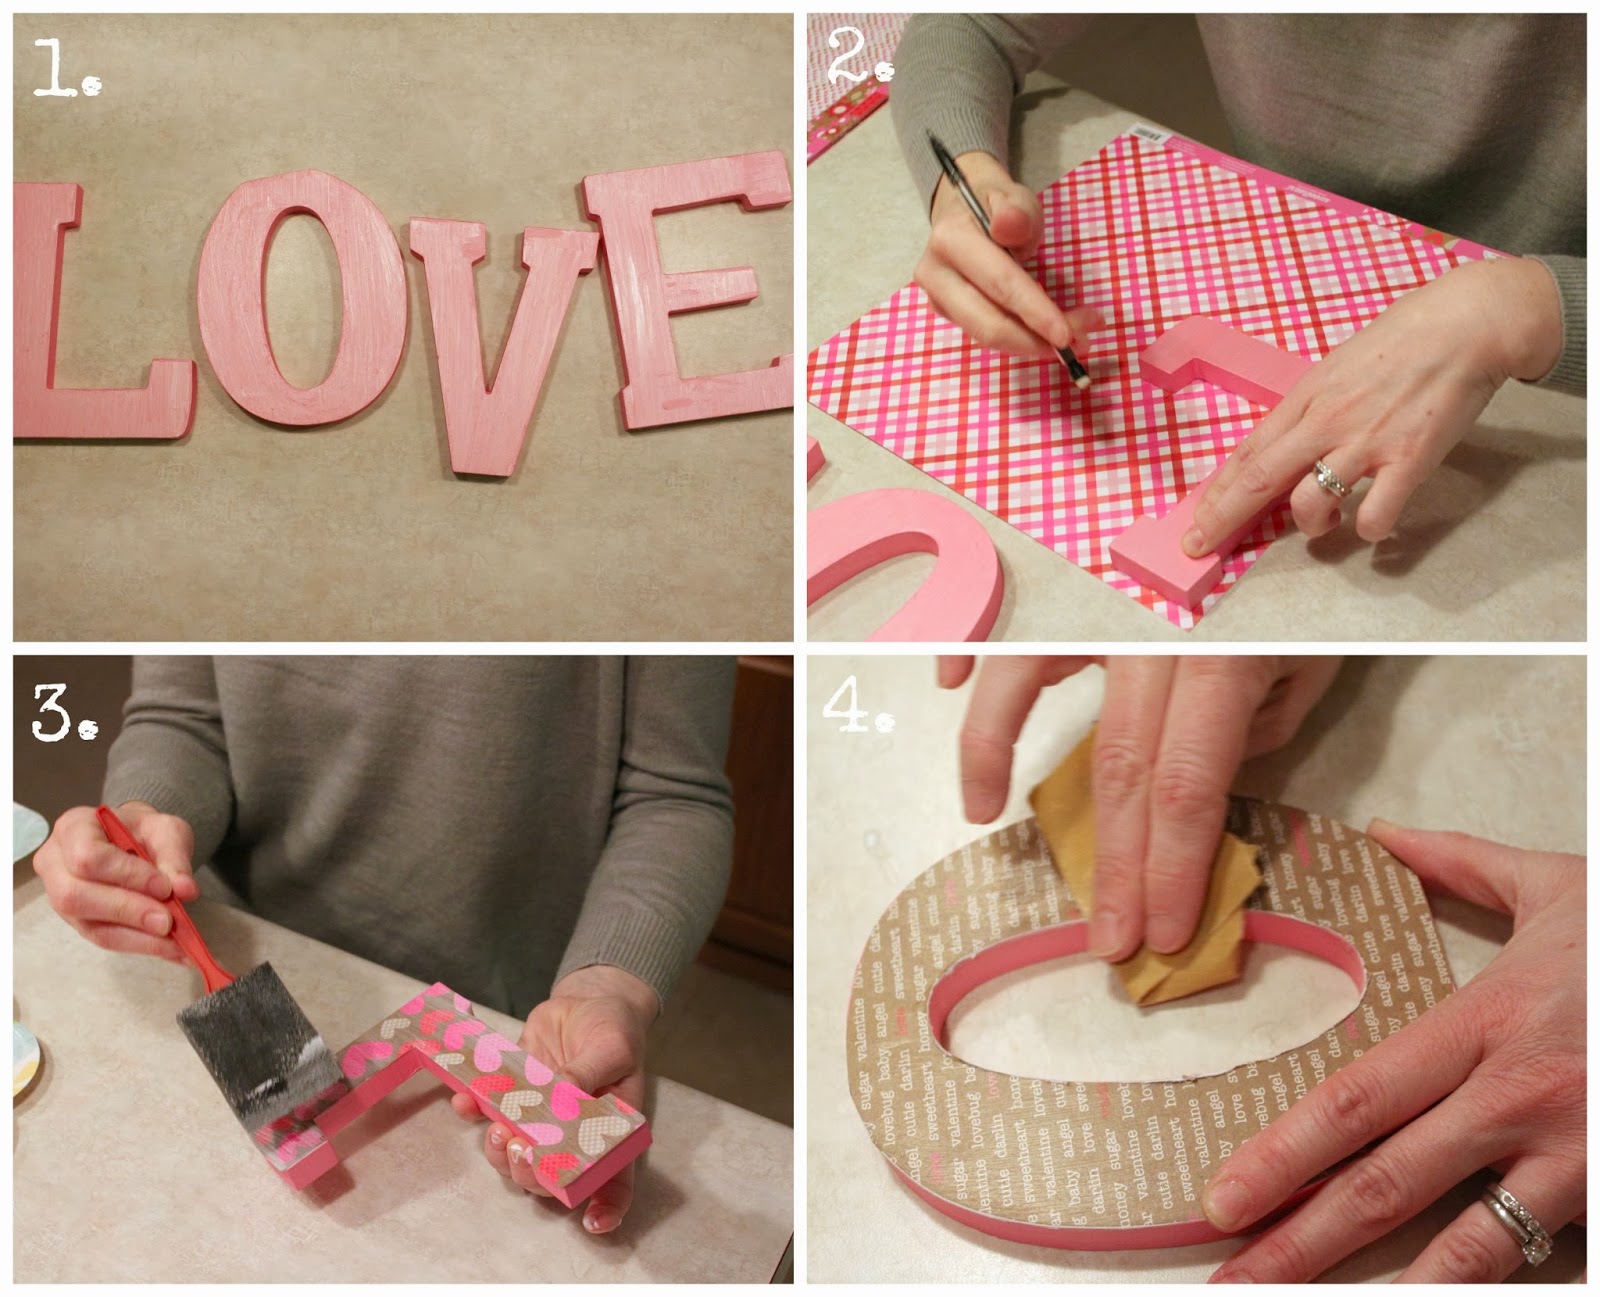
1. {Optional} Paint letters a fun color. I used acrylic craft paint, but I definitely would have spray painted them if the weather was warmer!
2. Trace your letters onto scrapbook paper and cut them out.
3. Mod-Podge your paper letters onto your wooden letters. {I did one layer under the scrapbook paper and then a top coat to seal it all up.}
4. {Secret to professional finished look}: After scrapbook paper is dry, use a piece of fine-grit sandpaper to sand the edges and get a distressed and finished edge! You can sand off any excess paper that’s hanging over the edge…it’s amazing!
Look at those professional-looking finished edges!
n’est-il pas parfait?
{That was for Mr. Hoff. It means, “Is it not perfect?” in French. It’s literally the only French phrase he remembers from his four years of high school French class…}

Here they are on my Valentine mantel…

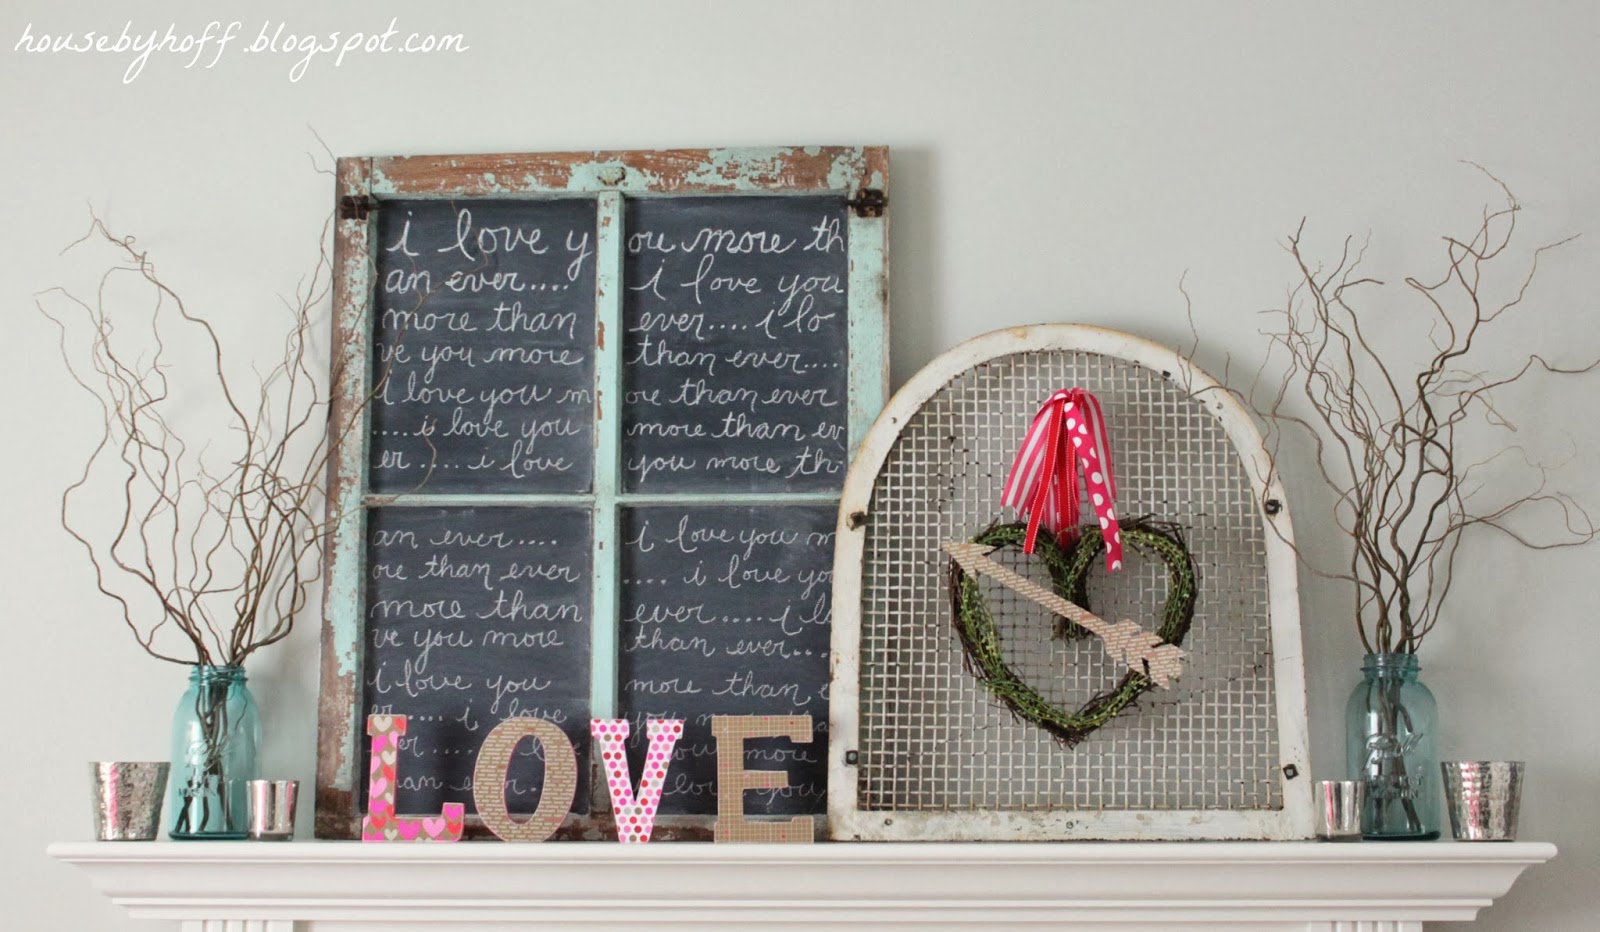
…Oh, and no worries. Miss L. got her carousel ride with her daddy!

n’est-il pas parfait?
CREATE.CRAFT.LOVE | DESIGNER TRAPPED IN LAWYER’S BODY
Have a great day! 🙂
I’m linking up at: Tatertots & Jello
Gorgeous wooden letters, April!I LOVE your Valentine mantel♥Hugs,
Everything!!!!!! I love all of Target! I especially love the knick knacks and furniture!!!!
Scrapbook stores are dangerous places aren’t they?! Love the papers you chose for your letters and your mantel looks amazing!
Ooh so pretty! Looks perfect to me! And thanks for the sanding tip! Hope you’re having a great week, April!
~Abby =)
<3 LOVE this! The letters are pretty and they look gorgeous on your beautiful mantel, friend!!
These turned out super cute, April! I love the chalkboard window on your mantel too!
Love those letters!
Such a fabulous project. I “love” it. Pun intended! So thrilled to be part of this blog hop with you!
– Tasha @ Designer Trapped in a Lawyer’s Body {www.designertrapped.com}
Scrapbook paper is one of my weaknesses…so many pretty choices. Love how your letters turned out! They look adorable on your mantel. XO
These are great April. Scrapbook paper makes things look so festive and pretty. Loved doing this hop with all of you. Such a fun way to discover new blogs!
Corey @ TinySidekick.com
Your letters turned out great…I’ve never used mod podge, but I’m definitely going to try it now! Thanks for sharing! ~Lisa @ Practically Perfect Home
I love the letters! They are adorable. I also love the way the mantle is decorated!