It’s Photograhy Wednesday, and I have such a treat for you today!
Carrie, from Lovely Etc. is here to show us a GENIUS way to get the look of a soft box without spending a single penny to buy one!
~
Hi House of Hoff readers!
My name is Carrie and I blog at Lovely Etc. I am a creative, frugal, use what you’ve got and make it work kind of girl and I am so excited to share with you this free DIY photography light.

A couple of years ago when I started working to improve my photography, I quickly realized that natural lighting is a must for good photos. And that flash is generally a major no-no. This is just as true when photographing your family as it is when photographing a furniture reveal.
I used to think flash was a necessity – nobody wants dark pictures! But when I got rid of the flash, my photos of everything instantly became one thousand times better. Natural light really does make for magical photos. But there was still a problem. Natural light might make for magical photos, but unfortunately my house doesn’t really do natural light. We live in an amazing wooded neighborhood shaded by gorgeous towering trees. Trees that manage to shade pretty much every single window in the house. And while the flash doesn’t make for great photos, neither does shadowy darkness.
When I decided to take monthly baby photos of my little guy, I chose a cute little nook in his nursery to take the pictures each month to show how he grew and changed. The lighting wasn’t great, but on a bright sunny day, it worked just fine. The photos turned out great all winter..but by May, there was a major problem. Even in the middle of the sunniest day, the room was still way too dark for photos. It took me a few days to figure out my fatal mistake. When I started taking the photos in the middle of winter,the huge white oak tree in our front yard was bare of leaves. Once spring took hold though, its millions of leaves blocked almost every speck of direct sunlight from the nursery. Grr. So the little nook with reasonable light was suddenly one of the darkest, most shadowy corners of the house. After five straight months of taking pictures in that spot, there was no way I was going to change to another area of the house. So I experimented with several lighting options – with pretty poor results.

Using only the available natural light was way too dark. The overhead light was too yellow and caused a ton of shadows. And the flash illuminated everything but also washed everything out, including my cute little baby. I know professional photographers take great portraits without sunlight all the time but I do not have any fancy lights and reflectors. I don’t even have an external flash. I decided that what I needed were some softboxes which give off a very diffuse, natural looking light…so I made my own. But for free. Well, almost free. I did have to buy some lightbulbs. 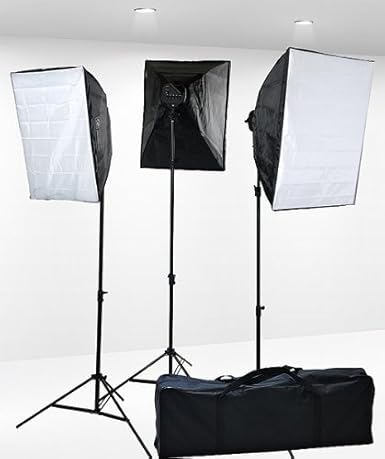
This is what the softboxes you can buy look like. Fair warning: mine look nothing like this. (But, hey, looks aren’t everything). I cut two corners off an old cardboard box and then cut a whole right in the center of each corner for the lightbulb to stick through. I covered the interior of the box with aluminum foil to make it reflective. At this point it looked kind of like one of those collars dogs wear to keep them from scratching. Then I stuck the whole contraption onto a lamp base and screwed a natural daylight bulb into the lamp.

The last step was to throw a white sheet over the top to diffuse the light. And there you have it – a free photography softbox. Note: you must use natural daylight light bulbs. Other bulbs give a very yellow light but these give a clean, white light.

To get the best lighting with the least shadows, I leaned one on top of a hamper and held the other one. And as crazy as the whole thing sounds and looks…it worked really well. Here is a comparison.

My little darling’s picture turned out pretty great considering how dark this room was.

I so love figuring out how to get just what I want without spending money! Be sure to stop by and visit my at Lovely Etc. sometime.
This is great! I’ve been struggling with shots in our basement and my craft room where there is very little natural light. Maybe I should go grab some cardboard and tinfoil!! Thanks for the tips!
This is a GREAT how to!! thank you so much! I don’t pay much attention to my photography…but I REALLY should. I have noticed a lot of photos where I went wrong…and some where I went right. I want to try this!
I don’t know about you, but I learn from my mistakes and my successes behind the camera! I’m always learning! 🙂
This is really. really smart! Thanks so much for sharing this great idea. Lighting in photographs of rooms can be tricky, and I’m not always able to take photos at the optimal time of day. This will get me a long way toward solving that problem. Can’t wait to try it!
Isn’t it genius, Amy?! I can’t wait to try it out!
This is amazing, I will be suing this for sure. I have a few space in my home that have no light (bathroom and laundry room) and for any kind of project pictures they always turn out horrible. Thank you for this.