It’s Monday again! I’ve been itching to publish this post since I finished this project on Friday afternoon! I’ve got to say, this chicken wire frame came together very nicely!
 |
| DIY Chicken Wire Frame |
I saw this idea on Pinterest ages ago but didn’t have a frame that was just right for the project. I found this nice large wooden frame at Goodwill (one of my favorite places to hunt for milk glass and potential projects) for $2. I snatched it up and brought it home. Like many projects, it sat in our garage for about 4 months before I decided to actually do something with it.
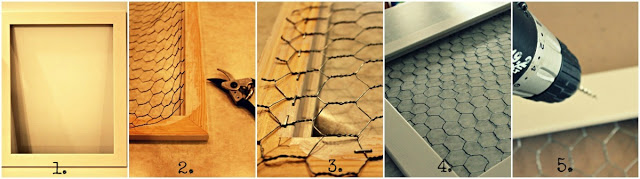
1. I don’t have a picture of the frame before I painted it white, but it was just an unfinished wooden frame.
2. When I looked at Lowes and Menard’s for chicken wire, I was unpleasantly surprised to find out that you have to buy a gigantic roll. I remembered seeing our neighbors using some chicken wire for a project, so I did what anyone would do, I sent my husband over to ask if we could borrow some! I used heavy duty snippers (I’m positive that that isn’t the correct name for that tool) and snipped the wire to the correct size.
3. To secure the chicken wire to the back of the frame I used a staple gun. It was the first time I’ve ever used a staple gun, and, after several failed attempts to load staples into it, I went back to Menards and had a sales associate patiently explain how to easily load the staples. Thank you, sir.
4. Flip it over, and admire your handy work. This could be your completed project, but I wanted to add some knobs.
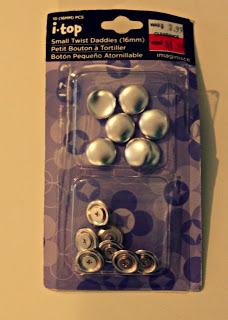
5. Drill holes and add knobs. Can you spot my mistake on the middle knob? Will I ever learn to measure twice, drill once?!?
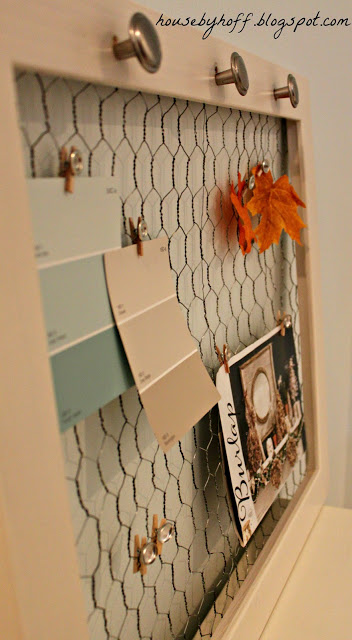
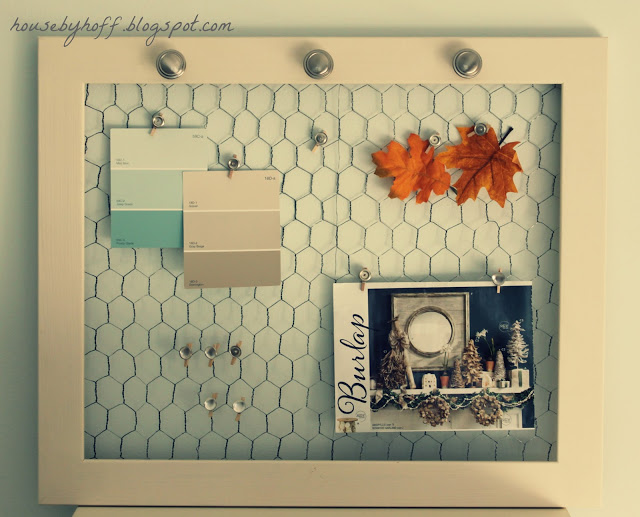
There! All done! This is my new inspiration board. It’s going to hang over the counter in my laundry room…when the laundry room gets done. (It’s almost done…so excited to share it later!)
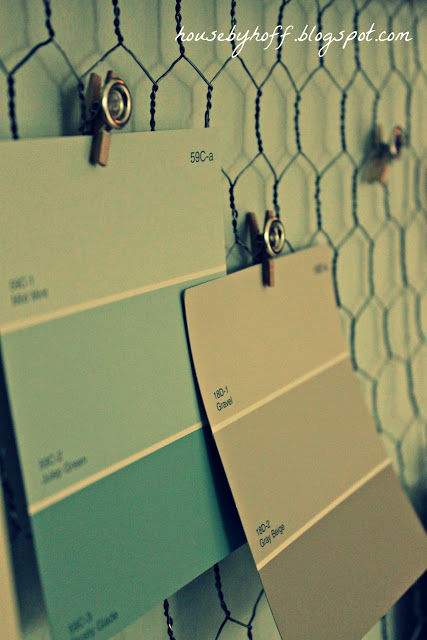
Let’s talk about these little clips! You can find the mini clothespins at Hobby Lobby or Meijer. I hot glued the little snappy things onto the clothespins. They catch the light and look a little blingy…which I like! I found them in the sale bin at Michael’s.
The hardest part about this project was figuring out how to load the staple gun. If you want me to explain it to you, email me! I’ll let you in on the insider secrets!
I love the chicken wire you added. It makes this old frame such a cool statement piece!
Super cute April! I love the clips 🙂
Very cute! Adding the “snappy things” to the clothes pins really just adds a little something special! 🙂
I absolutely love this project! This could be used for so many things notes, projects, jewelry! I would love if you would share this over at my blog hop http://www.ablossominglife.com/2013/01/frugal-crafty-home-blog-hop-7.html
Too cute! You did such a good job!
Love this! Love anything chicken wire!!! Did you add anything to the back to keep the snipped ends of chicken wire from scratching the wall? For some reason, my paint scratches and chips super easy. 🙁
No, I didn’t do anything to the chicken wire. It is scratchy on the back, but doesn’t scratch up my wall. 🙂
Gotcha! I cannot wait to try this!
This looks so good! I’ve been wanting to do something like this.
I’d love it if you’d link this up to The Pinspiration Project!
http://www.luluandsweetpea.com/2013/01/the-pinspiration-project-20.html