With this easy DIY tutorial I will show you how to make a lovely burlap wreath!

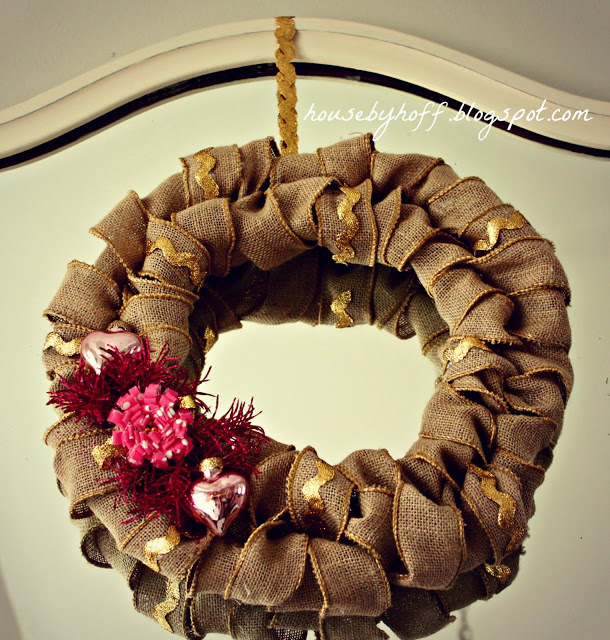
I’ve seen so many cute burlap wreaths out there in blog-land, and I decided to try one for my Valentine wreath this year:
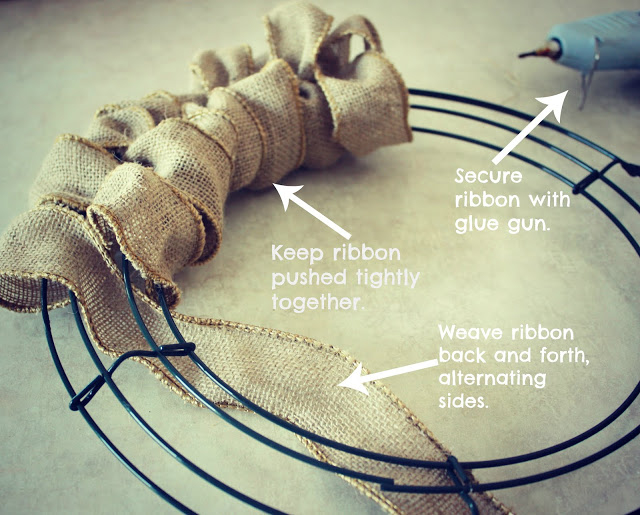
This DIY wreath took 10 yards of burlap ribbon from JoAnn. 10 yards seems like a lot, but in order to completely hide the wire wreath frame, you have to “smush” the ribbon together as you weave it back and forth.
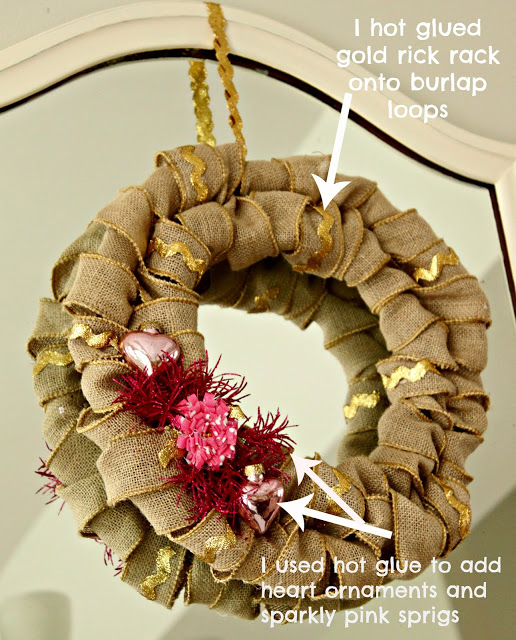
Once you have the burlap wreath finished, it’s time to add the show stopping sparkle and *bling*!
Here is a quick tutorial on now to make the little fabric flower:
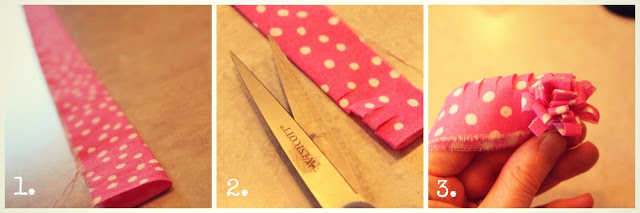
1. Fold a 3″x12″ piece of fabric in half. Iron it, creating a crease down the middle.
2. Cut the fabric, creating a fringe on the folded side, (you can fringe the other side to get a more unfinished look).
3. Starting on one end, roll the fabric around the center. Secure your completed flower with hot glue.
I used hot glue to secure the petite flower onto the wreath.
That’s it! Making this wreath was actually pretty easy!
For more fun Valentine’s Day projects check out Heart & Arrow Valentine Wreath
Have a great day! 🙂
I’m linking up at:
Cute! I think I am going to make a burlap wreath!
I love the heart ornaments. So sweet.
you are so on top of things!!! nice work!!! i can’t believe how much you’ve done for valentine’s day so far!
Thanks for the quick tutorial on the ribbon flower! Too cute! Hopped over from Weekend Wrap Up Party! Have a great weekend!
Wow! Gorgeous wreath! I’ve never seen someone wrap the burlap around a wire wreath like that. So cool! I’m pinning this!
Navy Wifey Peters @ Submarine Sunday Link Party
http://usscrafty.blogspot.com/2013/01/submarine-sunday-16.html
This is so adorable! I found you on the link up at Blissfully Ever After. Super cute blog!!!
This is so adorable! I found you on the link up at Blissfully Ever After. Super cute blog!!!