I am a bit of a girly-girl, and I love feminine decor!
{You want to know something funny? When I was pregnant with Miss L, I wanted to find out if it was a boy or girl mostly because if it was a girl, I wanted her to have a really feminine nursery and clothes. Seriously, that’s why I wanted to know.}
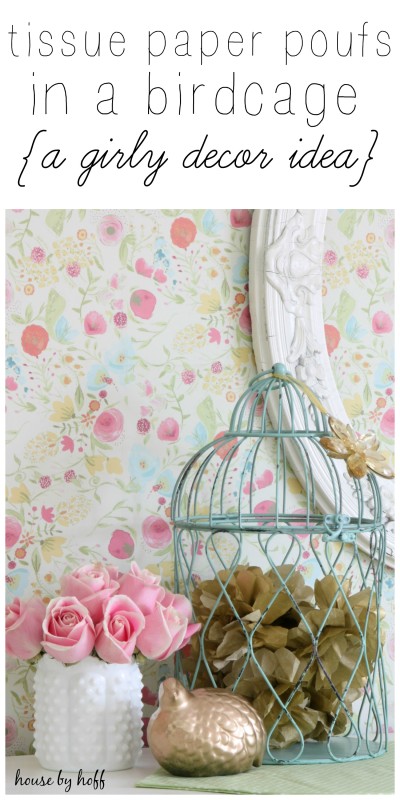
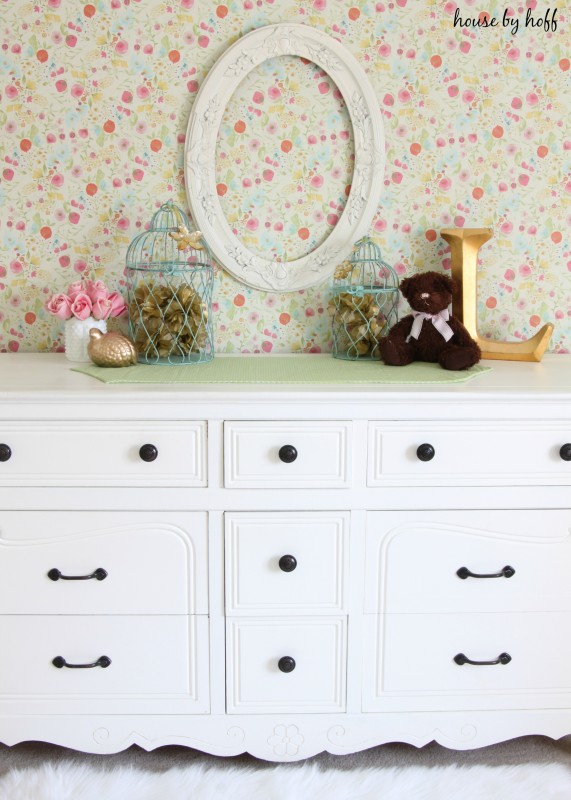
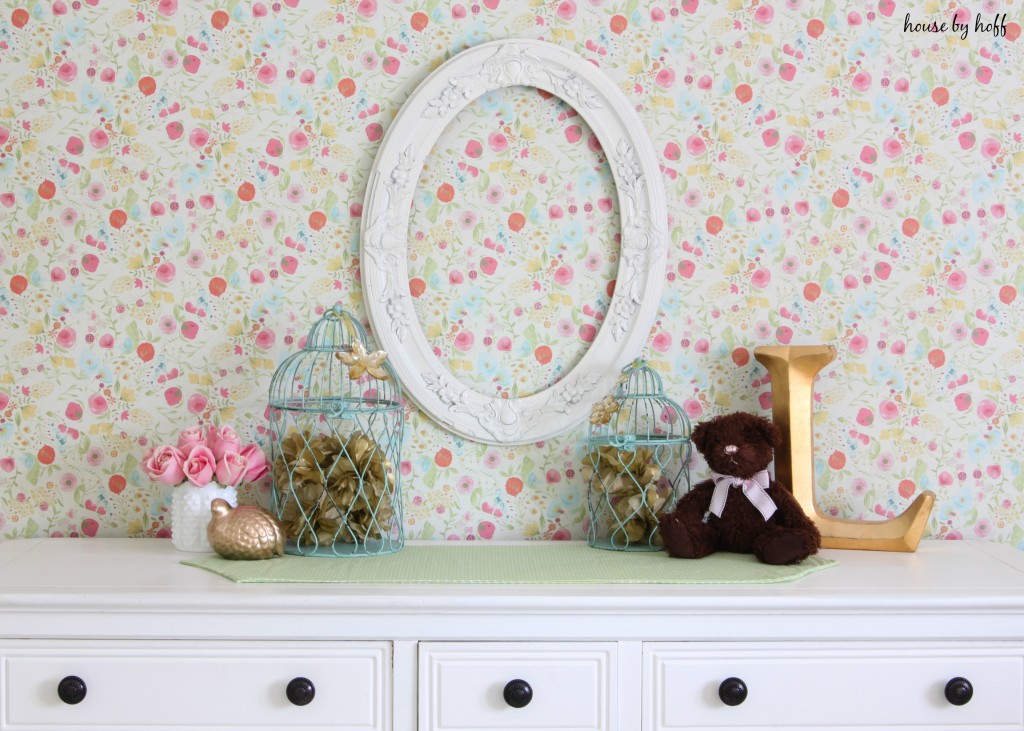
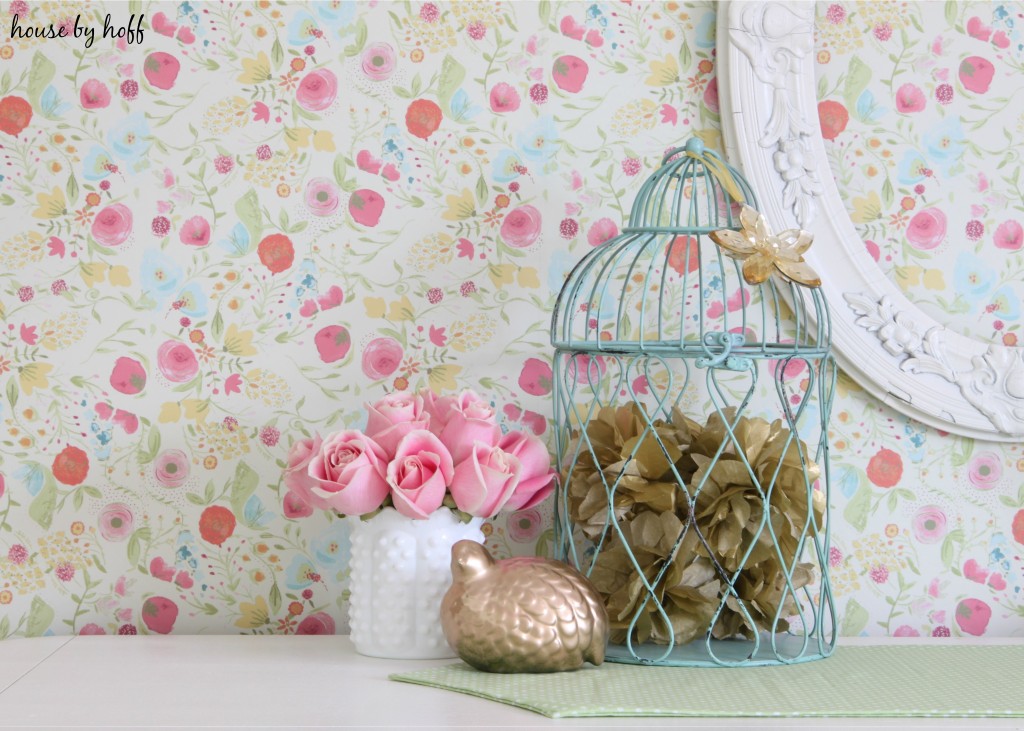
Not surprisingly, Miss L. is showing early signs of being a girly-girl too, so when it came time to change her nursery to a “big girl” room, I wanted some girly (and inexpensive) feminine decor. I loved the birdcages that I kept seeing in the PB Kids catalog, and when I found these pretty bird cages at Hobby Lobby, I snatched them up for her dresser.
Then, I had to figure out what to put in them. Hmmmm…..
I’m not sure how I settled on tissue paper poufs, but I bought tissue paper in a few different colors to try out in the cages. I finally settled on this kind of shimmery-gold paper.
Have you ever made tissue paper poufs before? They are quite easy. I’ll show you how:
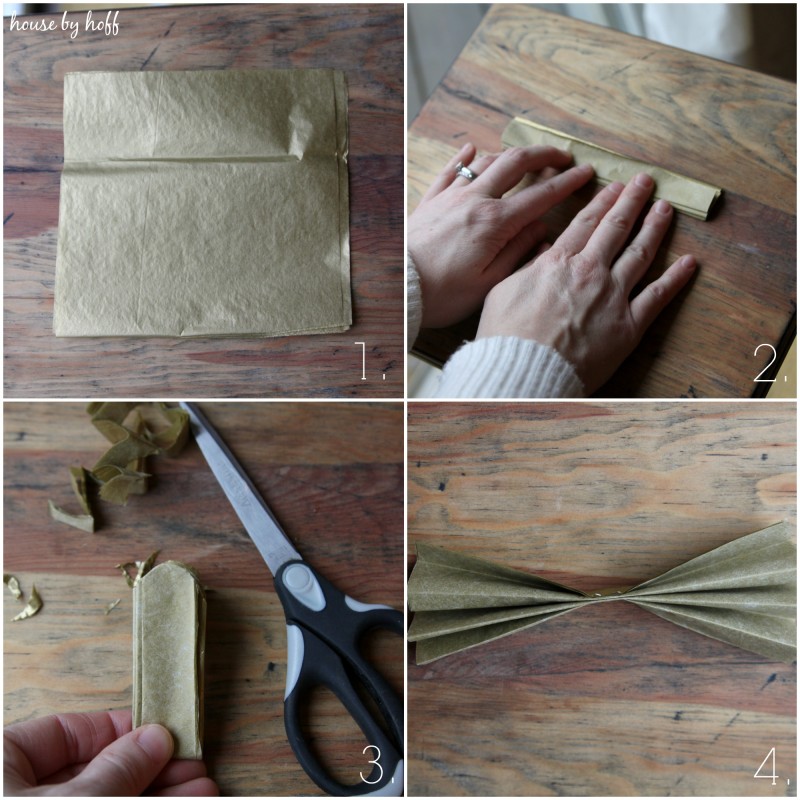
1. Cut five sheets of tissue paper into squares. My squares were roughly 5″ x 5″. If you want really bigger tissue paper poufs, then just make bigger squares.
2. Accordion fold your five sheets of paper.
3. Bend the folded paper in half and cut the end into a rounded shape. (This will give your poufs a more flowery look.)
4 Staple in the center of the accordion folded paper.
5. (Not pictured.) Gently pull apart the layers and fluff until you have a round tissue paper pouf.
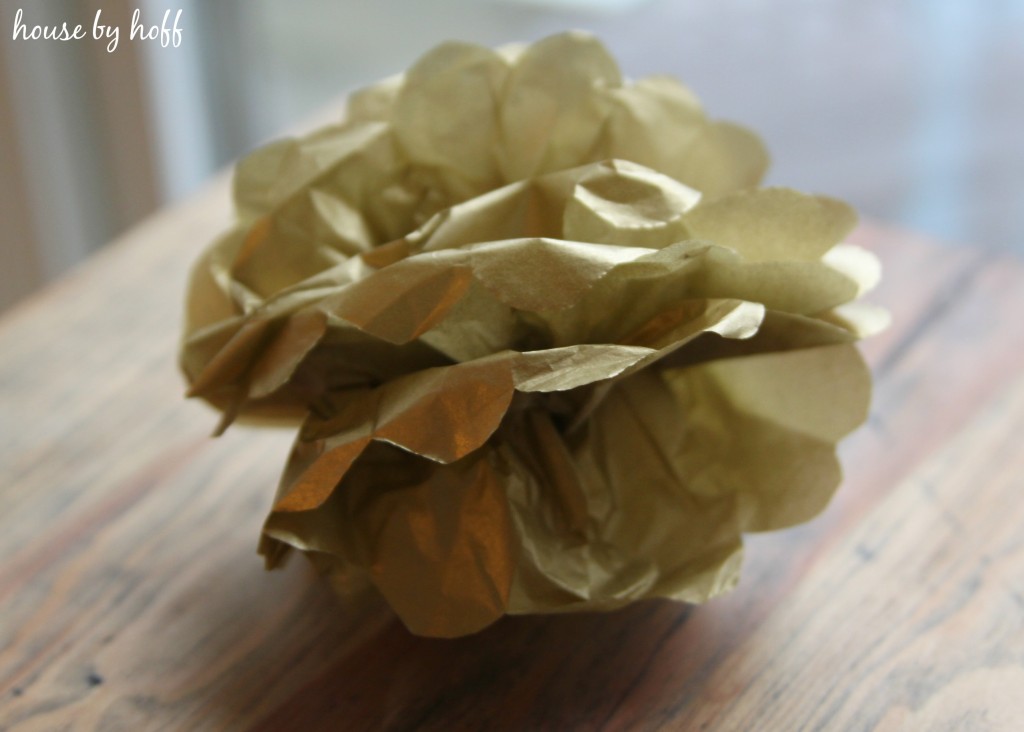
There she is! The finished pouf! There are so many fun things you can do with a tissue paper pouf (besides putting them in birdcages). String them from light fixtures, bunch them together, make a garland, etc., etc….
Looking at her newly made-over room just doesn’t get old to me. I love this space! 😉
Have a great day!

I just love that!! Very girly indeed!!
Thanks, Shawnna!