This is how I painted my two little side tables using a chalky finish spray paint.
Man, summer is flying! I have several old pieces of furniture in the garage that I’ve had every intention of pulling out and painting or staining this summer, and it just seems like I haven’t had enough time to get to them! The other day I actually had an entire free day. No photos to edit, no kid-related activities, no nothin’. The possibilities were endless. I knew exactly what I wanted to tackle, though. In my pile of old furniture in the garage were a set of two side tables that I found on the side of the road a few months ago. The owners at the house were cleaning out their garage, and had stacked some things along the road.
Well, I never met a stack of junk on the side of the road that didn’t intrigue me, so I pulled over. When I saw the these two little wooden side tables, I knew at once that they had to come home with me. 😉
The tables both looked like this to begin with. Pretty old and blah. They’ve seen better days. I had somebody DM me on Instagram that she had a side table just like this given to her by her Grandmother. She said that her Grandmother had them back in the 1940s…so they must be pretty old! I just love stories like that!
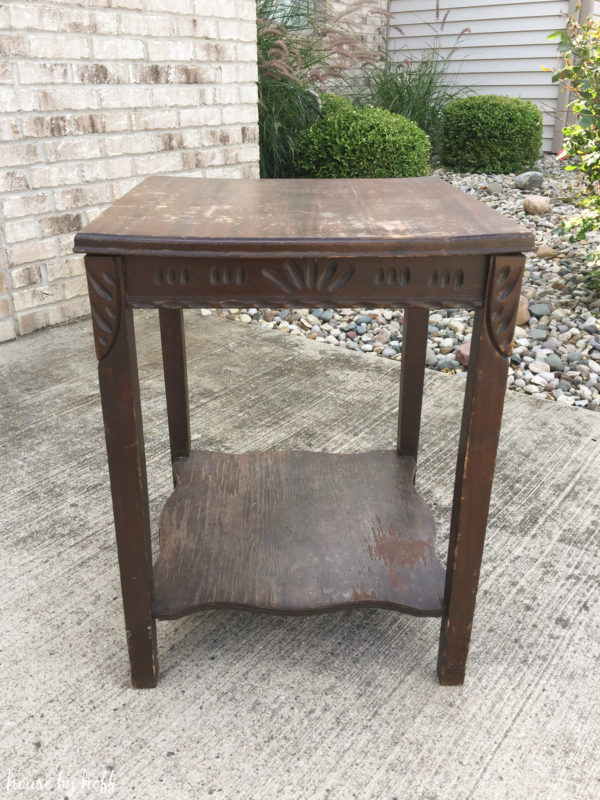
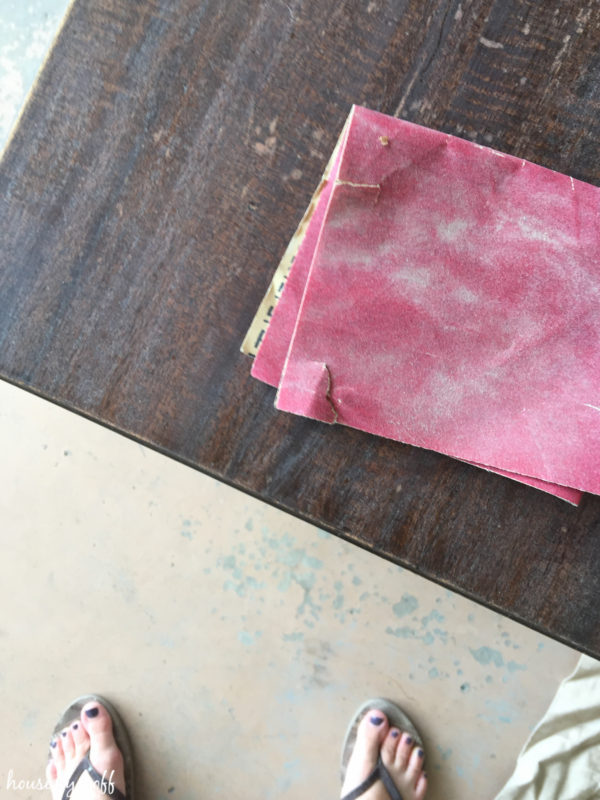
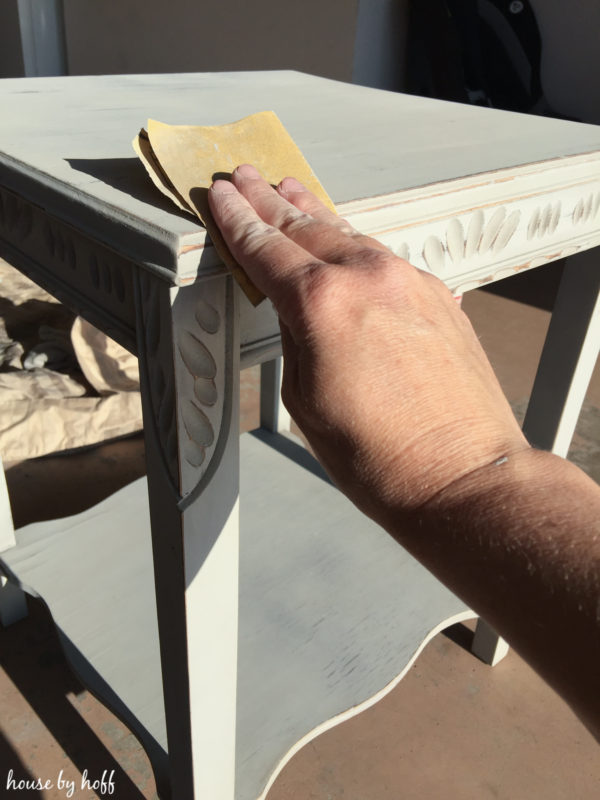
First I sanded these babies down as I wanted to remove any loose varnish and rough it up to get ready for paint.
I was pretty pumped to use this “Chalky Finish” spray paint. I had not used it yet, and the idea that chalk paint basically comes in a spray paint can now is rocking. my. world.
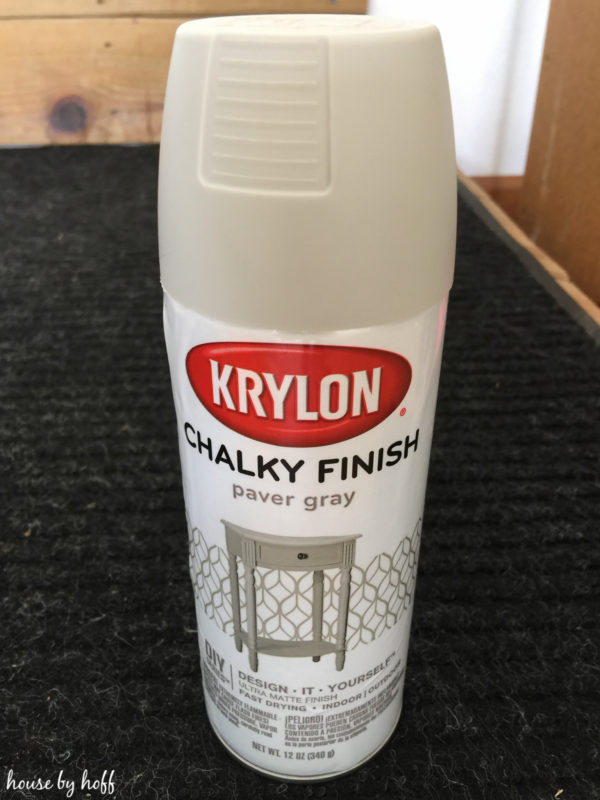
Couple of comments regarding the chalky finish spray paint: 1) To completely cover these dark tables, it took nearly three cans per table…which was more than I was expecting. 2) Between each coat, you have to sand down your piece with fine-grit sandpaper to remove the rough texture left when this paint dries. I just very lightly sanded in between each coat to smooth it back down. 3) This spray paint dries FAST, which is awesome when you’re trying to get a project done quickly…and when are we not trying to get a project done quickly?!
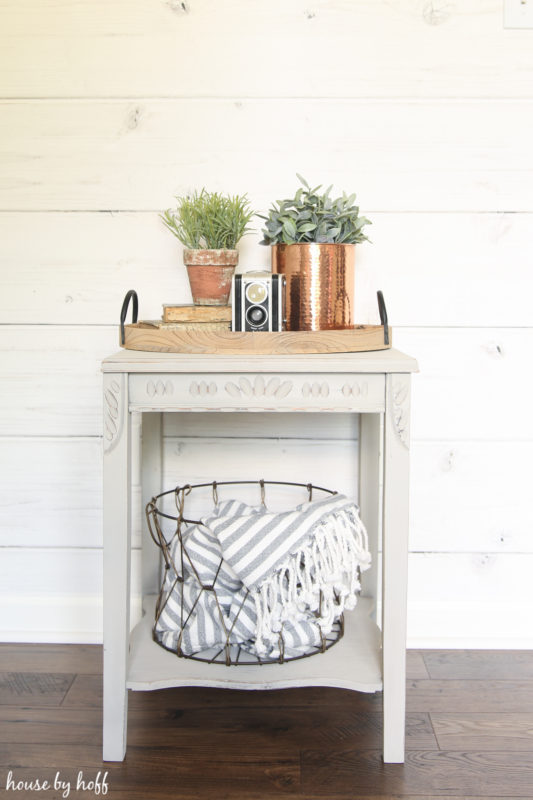
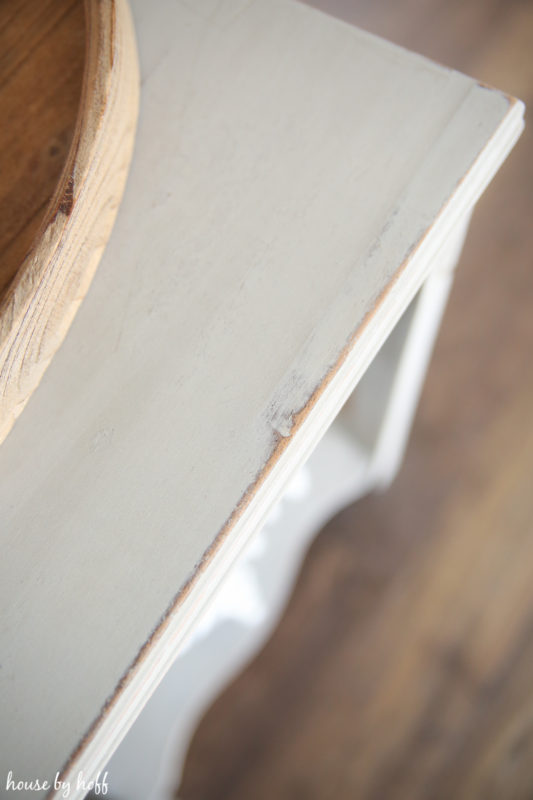
After the last coat I sanded down the tables to achieve the distressed look I was after. I really like the chalky finish spray paint, and the piece was very easy to distress. The finish is a matte look, which is true to the chalk-paint finish. I will definitely be using this product again. (Not sponsored at all.) 😉
Here is the finished wooden table. Isn’t she a cutie?! I’m giving these little tables to my niece, who will be moving into her first apartment in the next few weeks! 🙂
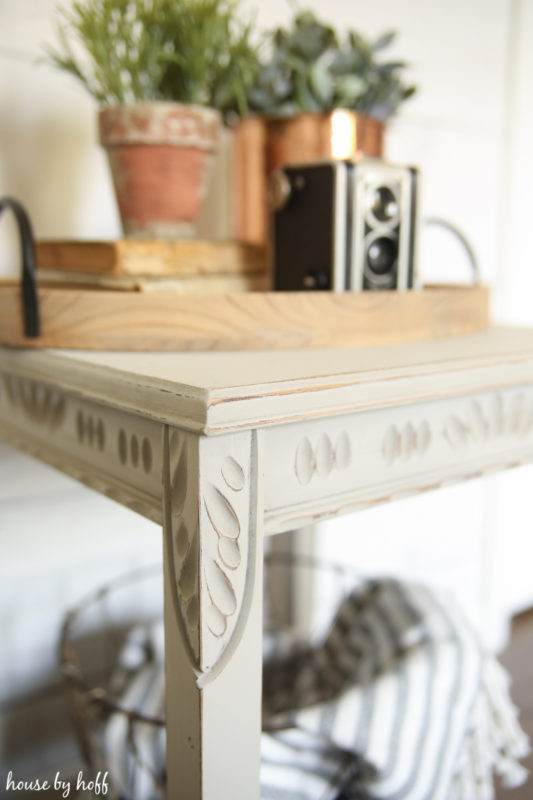
I LOVE the details on these tables. The shape of the tables and the etched out details were the reasons I went ahead and grabbed them off of the side of the road, rather than leave them. They were too darn cute to leave… 😉
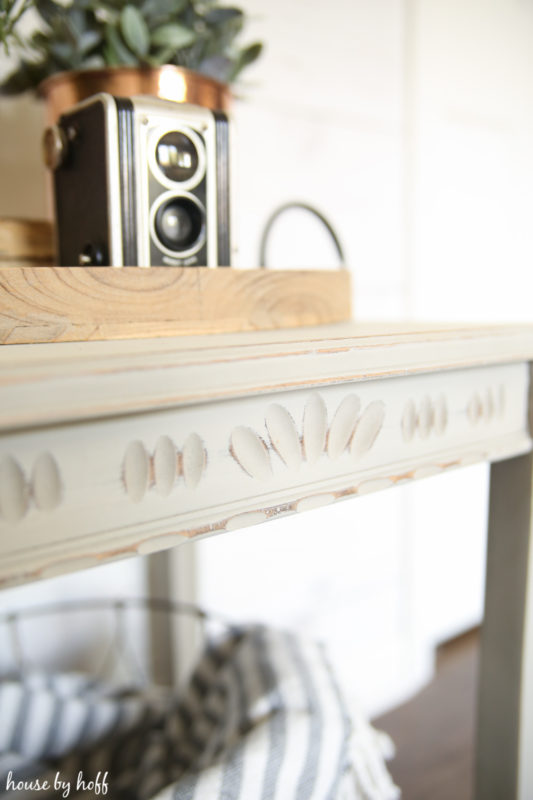
When I’m distressing (with fine grit sandpaper) I always make sure to distress the edges of the table. It gives it a naturally worn look that looks authentic to an actual aged piece.
Do you grab things off of the side of the road when you see them? What are your criteria for taking/leaving?

I mentioned that there were two tables, but you might have noticed that I only photographed one…that’s because the other one isn’t finished yet….ha!
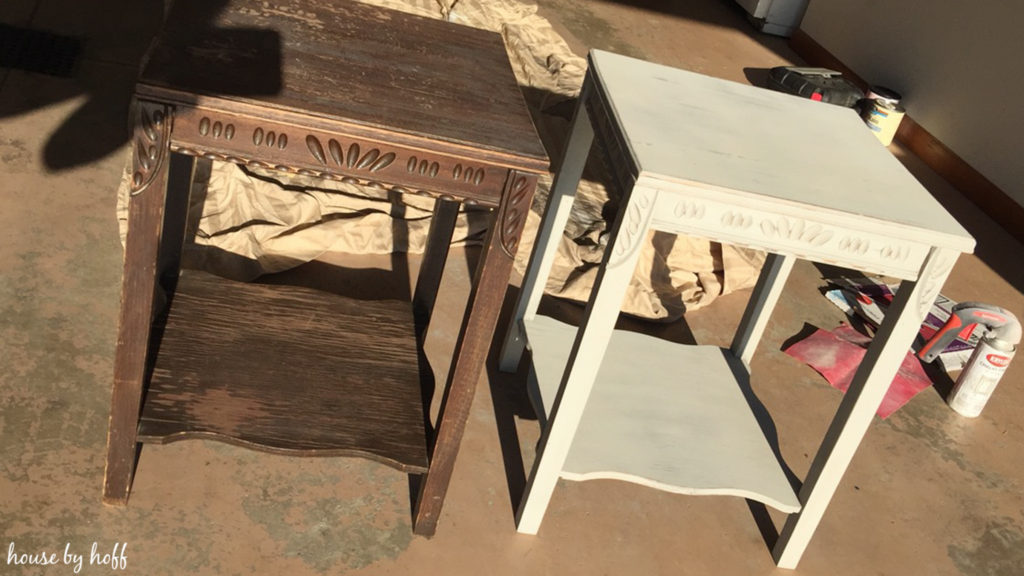
This is because I ran out of spray paint, so I plan on finishing the second table this week. I like this side by side comparison though!
Have a great day! 🙂
I’m linking up at the Show and Tell Link Party
I love this! I just did a post about furniture before and afters…so fun! Yours turned out great. I’ve never tried the chalk spray paint. It looks so smooth! I’m certain your niece will love them!
Thanks so much, April! 🙂
Did you have to wax the furniture since you used chalk paint? I love the finished product.
I have not added anything to seal it…but I never have good luck with wax. I’m thinking I might use a Water-Based Polycrylic though!
The tables turned out so cute! How nice of you to give them to your niece! They will be perfect for her first apartment! Love your blog!
Thanks so much, Susan! She’s always been a special girl to me, so I’m just happy to be able to give her something cute for her apartment! 🙂
I love this. I picked up a side table from someone’s trash pile a few weeks ago and hadn’t decided what to do with it — until now! Thanks for the inspiration!
Awesome! I’m so glad this was helpful! 🙂