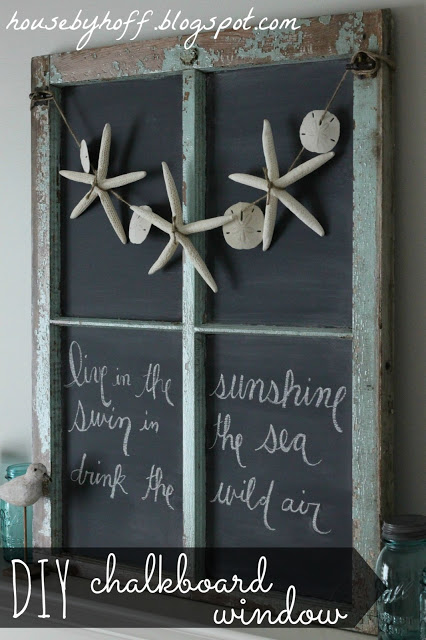
After fixing up this beautiful chalkboard window, I feel like I did a good deed.
I feel like I gave her some dignity. A reason for being. A new purpose.
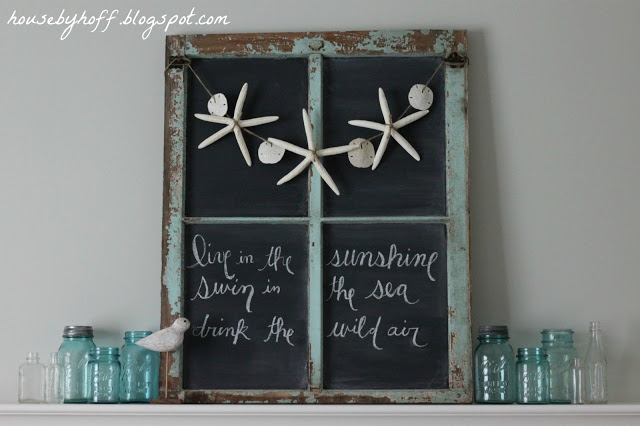
Yup. She is standing pretty tall, isn’t she? She looks pretty pleased with herself.
And why shouldn’t she be? She’s perfection.
Here’s how I transformed her:
I picked her up off of the side of the road and brought her home. I used some all purpose cleaner, a brush, and a hose (set on a gentle spray) to clean her up. I was very careful to preserve as much of the blue, chippy paint as I could.
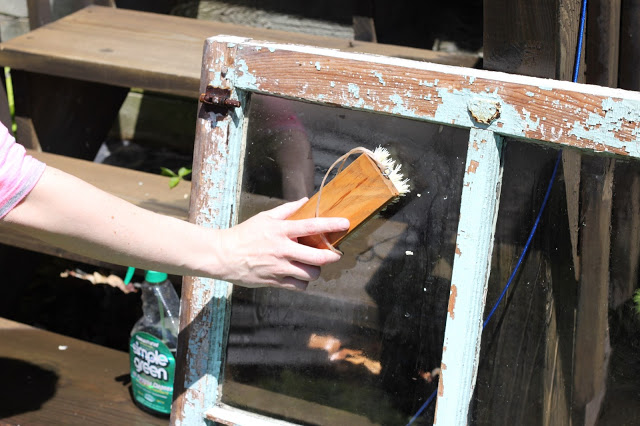
(I asked Mr. Hoff to take some pictures of me cleaning the window…He managed to snap some of the most unflattering photos of myself that I’ve ever seen. Rather than accept that I really look that bad, or question my clothing choices, I’m blaming his angle, the lighting, and his poor camera skills, and showing you this cropped version.)
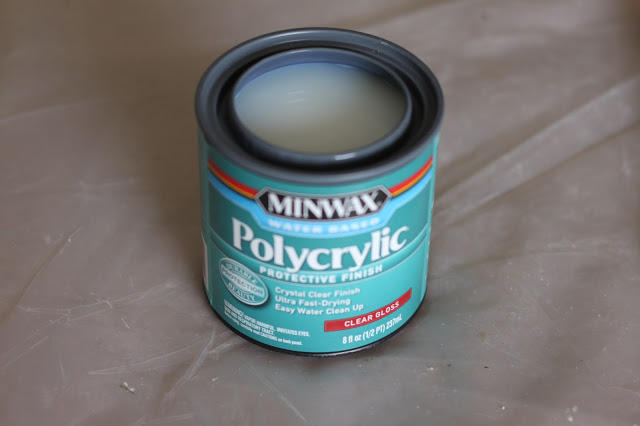
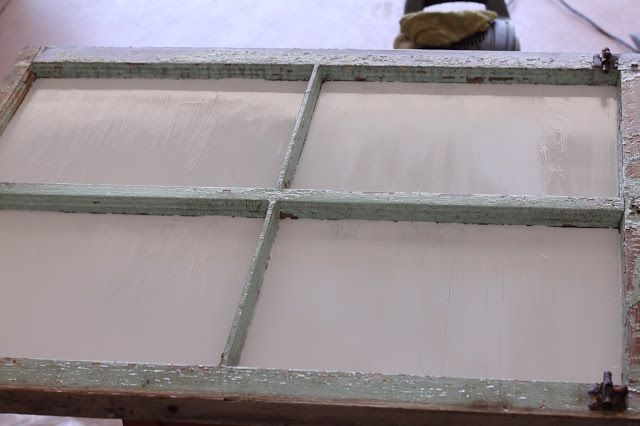
After she was dried off. I gave the wood frame a coat of this water-based polycrylic. I had it left over from my window towel rack. I suspected that the paint on this window was lead-based, and I wanted to seal it in. Like I mentioned in my towel rack tutorial, I am happy with the way this polycrylic seals in the paint without discoloring!
Next, I brushed the window panes with a coat of latex primer.
Then I brushed each window pane with two coats of chalkboard paint in a black finish. I gave the chalkboard paint 3 full days to cure. (That means that you can’t write on it for three days!)
{I totally spaced taking a picture of this step…sorry!}
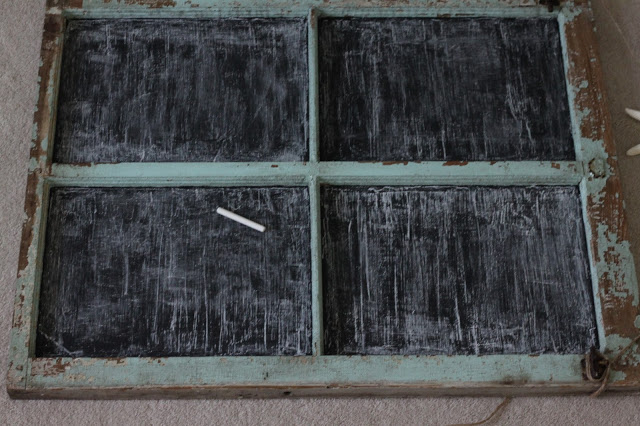
After the 3 days were over, I prepared the surface for chalk. To do this, I rubbed a piece of chalk sideways all over the entire surface. I let it sit for a few seconds, then erased it. (This is a key step, I’ve had some chalkboard paint failures because I didn’t do this!)
I found a beautiful, beachy quote that I wanted to write on my chalkboard.
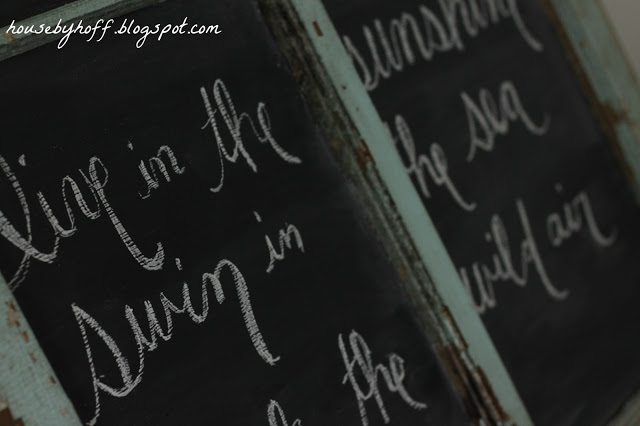
I used a great tutorial on how to create fake calligraphy here. Basically, you just write is swoopy letters and make all of your down strokes thicker. This took me about 20 minutes or so to get it just how I wanted it.
And that, my friends, is how my beautiful chalkboard window came to be.
Tomorrow, I’ll show you how I made my Starfish & Sand Dollar Garland!
If you’re also inspired by beachy décor, follow my Beach Inspiration Pinterest Board!
Have a great day! 🙂

I’m linking up at: Tatertots & Jello, It’s Overflowing, Give Me the Goods
Thanks for sharing this. I have some windows I’ve been wanting to turn into chalkboards but didn’t know if I would have to replace the glass or not. So happy to know I can paint directly on the glass!
Isn’t that exciting?! I’ll never forget discovering that I could paint on glass…it rocked my world! 🙂
That is so cute! I have actual slate boards that would work great behind a window frame. Thank you for the idea.
What a great idea! So glad this helped inspire you! 🙂
This turned out so well! Love the quote you chose! I don’t know how you waited 3 whole days to write on it. I wouldn’t have been able to!
Girrrrl…It was the longest three days of my life. I just knew I wanted it to be perfect, so I kept the end result in mind! 🙂
Love it!!! I love how you preserved the blue chippy paint! Can’t wait to see your garland tomorrow!
She is beautiful!
Beautiful Job! I would never have thought to prime the windows first or to seal the original chippy paint. I may have to keep my eye out for some windows.
Amazing! Love it! Thank you so much for sharing at Give Me The Goods Monday!
Jamie @ Better With Age
This comment has been removed by a blog administrator.
spontaneous art
Did you tape off before painting the windows? Tips for not getting chalk paint on the panes?
Thanks
Yes, I taped off the edges of the door around the window pane before painting. 🙂
Can you use wet chalk on this?
I don’t see why not! 😉
What brand of chalkboard paint do you prefer for Windows?
Any ideas for if your window doesn’t have glass in it?